How Is a Compact Laminate Cafe Table Manufactured

A compact laminate cafe table is produced by high-pressure lamination: kraft paper saturated with phenolic resin and a melamine decorative face are pressed into a single non-porous sheet, which is then cut, edged and assembled. The nine stages described here run from incoming paper checks to final packaging, and each one carries part of the panel's water resistance, flatness and surface durability.
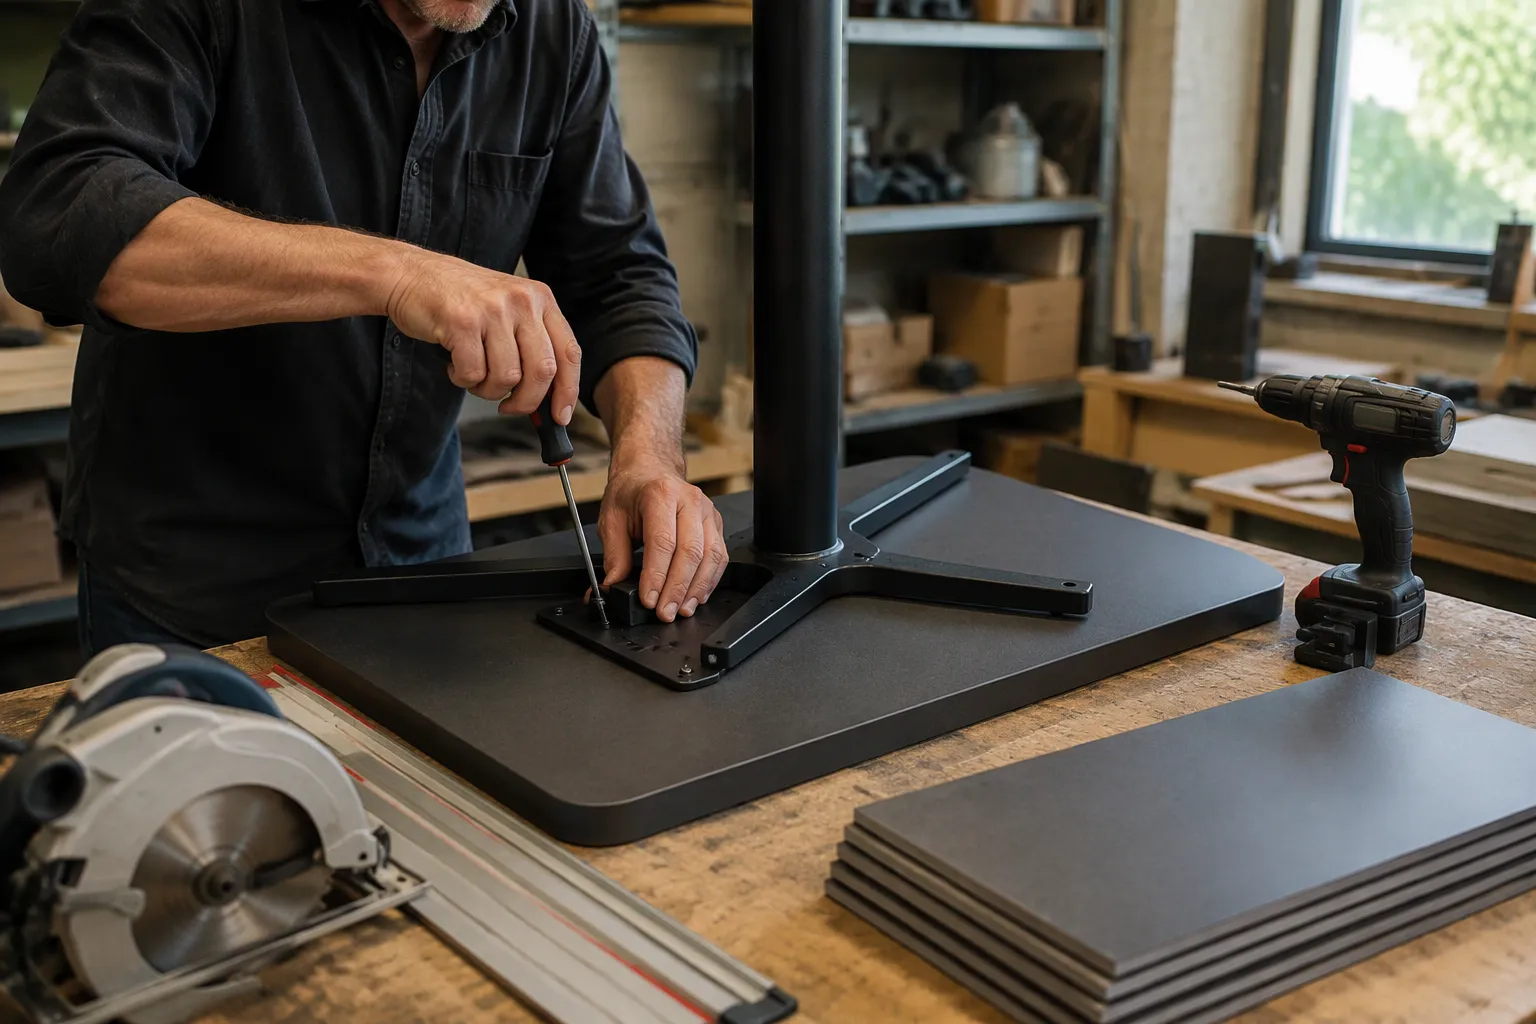
A compact laminate cafe table is made using high-pressure lamination. Layers of kraft paper and a decorative top are bonded with melamine and phenolic resin under intense heat and pressure. This manufacturing process has nine stages, from preparing raw materials to final packaging. Each stage shapes the table's durability and water resistance. Resin impregnation builds the moisture barrier. Pressing fuses the layers into one solid sheet. Cutting, edge finishing, and assembly turn that sheet into a finished piece of furniture. The core stays non-porous throughout, so spills and weather have little chance to get in. Buyers who understand these steps can judge quality with more confidence.
Key Takeaways
Compact laminate tables are made by gluing layers of paper and resin together using high heat and pressure.
The manufacturing process has nine steps, from getting the materials ready to final packaging.
Paper soaked in resin makes a strong core that keeps out water and dampness.
High pressure and heat join the layers into one strong sheet that water does not pass through.
Decorative top layers add color and pattern. They also protect the table from scratches and stains.
Edge finishing seals the table's rim to stop water damage and chips.
Quality checks confirm that each table is flat, sound and free of surface defects.
Knowing these steps helps buyers pick a cafe table that is strong and well made.
Compact Laminate Material Makeup and Manufacturing
Core Layers and Resins
Kraft paper as structural core
Compact laminate starts with layers of recycled paper fibers, usually kraft paper, stacked into a dense core; industry data on paper recycling and fibre recovery explains why recovered fibre is the usual feedstock for that core. Each sheet is soaked with phenolic resin, a thermoset plastic resin that hardens for good once cured. The paper gives the panel its body. The resin gives it strength and moisture resistance. Together they form a solid phenolic block with no empty spaces inside.
This construction makes compact laminate a self-supporting, stand-alone material. It needs no substrate such as plywood or particle board behind it. A 12 mm top holds its own weight and resists impact on its own. EN 438 defines compact grade as a laminate of 2 mm or more, while cafe tops are commonly specified between 12 mm and 13 mm, a range that keeps a two-person top stiff without excess weight. A separate comparison of high-pressure laminate and compact laminate sets out where the two grades diverge.
Melamine and phenolic resins
Two resins do different jobs, and both are formaldehyde-based thermosets, so published background on formaldehyde in resin systems is relevant to any indoor specification. Phenolic resin soaks the core layers and builds the water barrier. Melamine resin hardens the outer surface and resists scratches, stains, and heat. The melamine-impregnated décor paper sits on top and gives the visible face. This split of duties explains why a compact laminate cafe table stays dry inside even after rain.
Decorative Surface Papers
Color and pattern options
Decorative papers come in a wide range of colors and patterns. A stone-look design can copy marble without the weight of real stone. The Round Outdoor Bistro Table shows this approach. Its top uses a Calacatta 7378 matte finish with a white base and gray-gold veining for a marble look.
Matte and textured finishes
Press plates set the final surface texture. A matte finish cuts glare and hides fingerprints. Textured options add grip and depth. Buyers choose a finish based on setting and cleaning routine, not only appearance.
Incoming Material Checks
Paper weight and moisture
Factories weigh incoming paper and test its moisture content before use. Dry or heavy sheets change how much resin they absorb. Consistent paper keeps the final panel uniform.
Resin quality control
Resin batches undergo checks for viscosity and solids content. Stable resin flow protects the bond between layers. Plants reject uneven sheets early, which keeps defects out of the press.
Need the Press Data Behind the Panel?
Press cycles, resin content checks and the compact laminate range can be reviewed before a specification is fixed.
Resin Impregnation in Compact Laminate Manufacturing
Resin Bath Saturation
Even resin pickup
Impregnation turns dry paper into a sheet full of resin that is ready for pressing. Rolls of kraft paper go through a bath of liquid resin. The paper takes in resin the way a sponge soaks up water. Even pickup matters here. If one area of a sheet absorbs too much resin and another too little, it will press into an uneven panel.
Machine operators control line speed and bath level to keep pickup steady across the full width of the web. Tension rollers hold the paper flat as it moves along. A flat, evenly saturated sheet gives the press a starting point it can predict.
Controlling resin content
Resin content affects the final panel's density, strength, and moisture resistance. Too little resin leaves dry spots that can take in water later. Too much resin makes the sheet stiff and hard to handle. Plants set a target resin content for each paper grade and check it during the run. They weigh samples before and after saturation to make sure the pickup stays on target.
Drying and Partial Curing
Solvent removal in ovens
Wet impregnated paper moves into a drying oven, a stage described in paper industry technical literature on impregnation and drying. Heat drives off the solvent and water carried in the resin. The paper leaves the oven dry to the touch but not fully hardened. Airflow and temperature zones along the oven length control how fast the moisture leaves. A gentle, even dry stops surface skinning, which can trap moisture inside the sheet.
Why partial cure matters
The resin cures only partway at this stage. This partial cure, often called a B-stage, keeps the resin slightly soft and able to flow. That softness matters later. During pressing, the resin must melt and flow between layers before it hardens for good. A sheet that cures fully in the oven cannot bond. The B-stage gives the press the flow it needs.
Impregnated Paper Inspection
Resin flow testing
Quality teams test how much the resin flows under heat. A small sample goes between heated platens, and staff measure how far the resin spreads. Consistent flow predicts a good bond in the full press cycle. Poor flow signals a curing problem in the oven.
Rejecting uneven sheets
Inspectors also check for streaks, dry patches, and wrinkles. Any sheet with uneven resin pickup goes to scrap. This screening keeps defects out of the layup. Clean, uniform sheets are the foundation of a reliable compact laminate, and the same discipline carries into every hpl panel a plant produces. The phenolic core depends on this step for its water resistance, while the melamine surface layer gets its hardness from the same process.
Layering and Assembly
Building the Stack
Core layer arrangement
Assembly starts at a layup table. Workers stack several layers of kraft paper into a neat pile. Each sheet carries phenolic resin from the impregnation line. The stack forms the structural core of the panel. Hands and guides keep every sheet lined up, because a shifted layer creates a weak edge later.
Decorative top and bottom
A decorative sheet goes on the top of the stack. A second decorative sheet goes on the bottom. These layers carry melamine resin and the visible color or pattern. So the finished compact laminate looks the same from either face. This balance also keeps the panel from curling toward one side during curing.
Thickness and Layer Count
Layers determine final thickness
Layer count sets the final thickness. More layers of saturated paper mean a thicker, heavier panel. A 12 mm top needs a certain number of core sheets, and the plant figures out that count from the paper weight and target thickness. Thickness control starts here, long before the press closes.
Typical counts for cafe tops
Cafe table tops usually fall in the compact grade range of 12 mm to 13 mm. The Round Outdoor Bistro Table uses a 12 mm phenolic top. That thickness supports two-person dining without extra weight. The same logic applies to other hpl table tops built for daily service.
Release Films and Press Plates
Preventing sticking
A release film sits between the stack and the press plates. This thin sheet stops resin from sticking to the steel. Workers also place caul plates or pads to spread pressure evenly. Clean release layers protect the surface and keep the press running without stops.
Textured plate finishes
Press plates carry the surface pattern. A polished plate gives a gloss face. A brushed plate gives a matte face. An etched plate gives an embossed texture. The Calacatta 7378 matte finish on the bistro table comes from a matte plate. The plate texture moves to the resin surface during pressing, so the look is built in, not added afterward.
The stack now holds a kraft core, two decorative faces, and a release film on each side. It is ready for the press. No substrate sits underneath, because the panel supports itself.
High-Pressure Compact Laminate Lamination
The Press Cycle
Loading the press
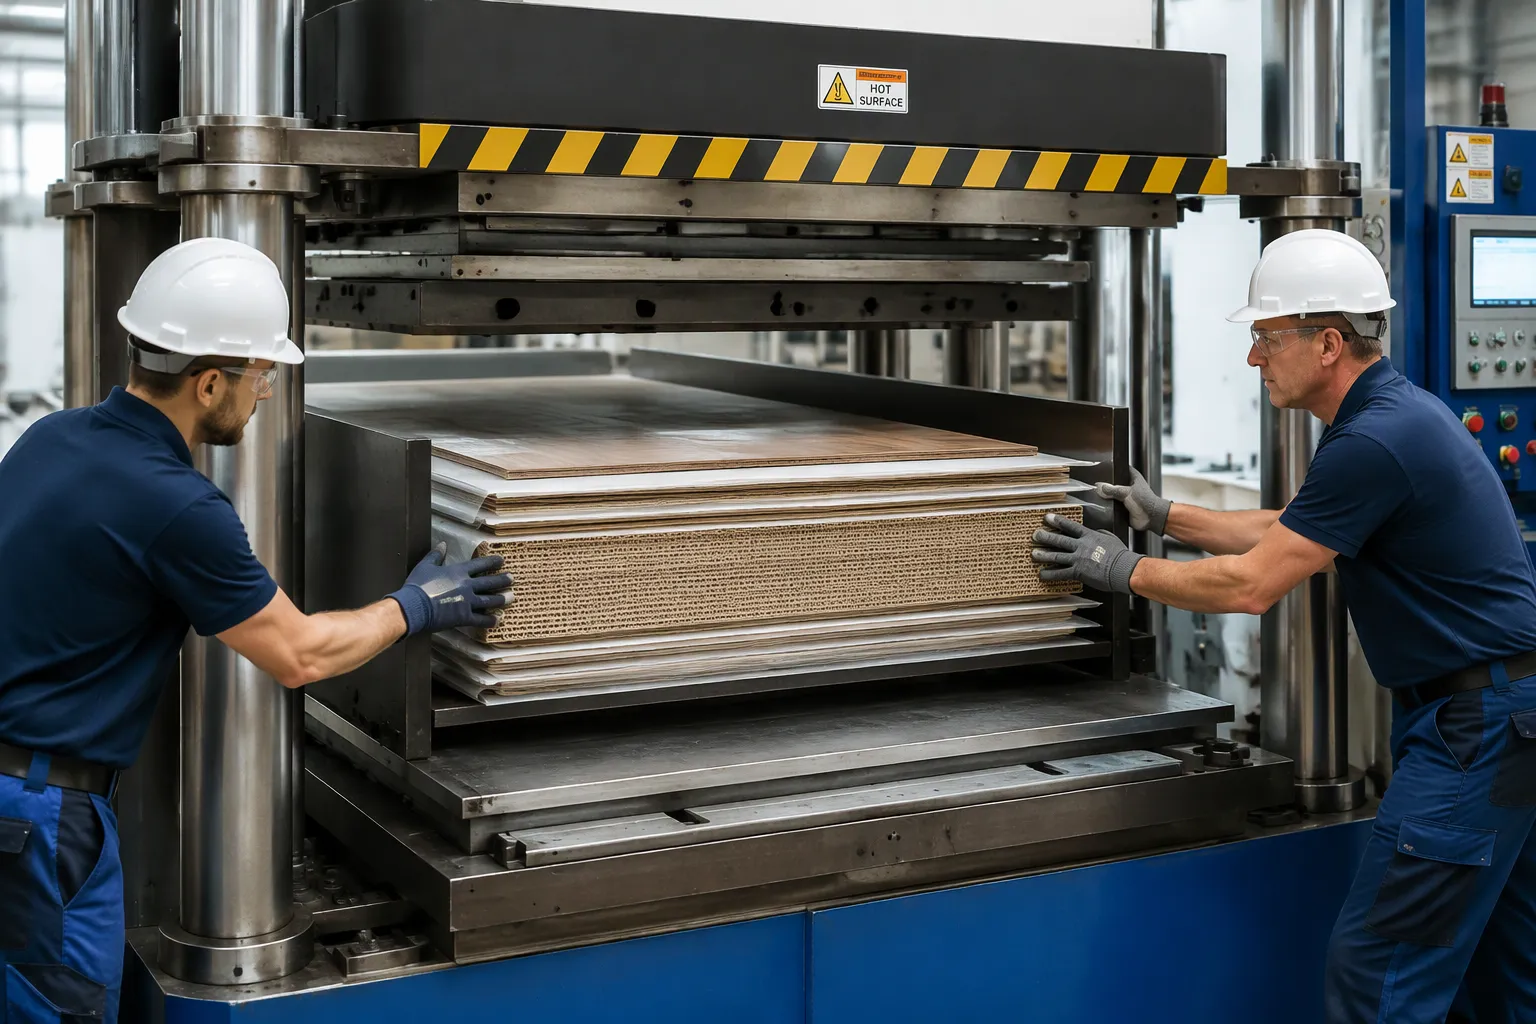
Workers move the prepared stack into a hydraulic press. The stack holds the kraft core, two decorative faces, and release films. A loader aligns the stack between the press plates. Caul plates sit on each side to spread force evenly. The plates close and the cycle begins. This step is the heart of high-pressure compact laminate production. The press applies heat and pressure at the same time. The combination turns a loose pile of resin-soaked paper into a single solid sheet. Loading speed matters. A stack that sits too long before pressing can pick up moisture from the air. Operators keep the layup area dry and move stacks quickly. A misaligned stack shifts under pressure and produces an uneven panel. Guides and stops on the press table keep the stack in place.
Heat and pressure settings
The press heats the stack to around 150°C. Pressure climbs to about 1,000 psi (roughly 6.9 MPa) or higher. These settings stay steady through the cycle. Heat softens the resin so it can flow. Pressure forces the layers together and squeezes out trapped air. The press holds both conditions for a set time. The resin needs enough time to flow and cure. A short cycle leaves weak bonds. A long cycle wastes energy and can over-cure the surface. Operators follow a recipe for each thickness and paper grade. A 12 mm top needs a different cycle than a thinner panel. The recipe balances temperature, pressure, and time for the target density. Pressure that runs too low leaves voids. Pressure that runs too high can crush the paper fibers and weaken the core.
Resin Flow and Curing
Cross-linking under heat
Heat triggers a chemical change in the resin. The polymer chains link together in a process called cross-linking. The resin moves from a soft, flowable state to a hard, infusible one. This change is permanent. The panel will not soften again under normal cafe conditions. The melamine surface and the phenolic resin core both cross-link during the same cycle. The result is a solid phenolic sheet with a hard, stain-resistant face. Cross-linking also locks the layers together. The resin forms chemical bonds across the paper interfaces. These bonds give the panel its strength and its resistance to water. The reaction gives off heat as it runs. A well-controlled cycle manages that heat so the panel cures evenly through its full thickness.
Eliminating air pockets
Air trapped between layers weakens the panel. Pressure drives that air out. The resin flows into the gaps and fills them. The press plates squeeze the stack until the layers sit tight against each other. Any remaining air dissolves or moves to the edges. A panel with trapped air shows blisters or soft spots after cooling. Good pressure control prevents these defects. The physics is simple: high pressure compresses the stack and forces the resin to fill every void. A slow pressure ramp lets air escape before the resin gels. A fast ramp can trap air inside. Operators watch the pressure gauge and the panel surface for signs of trouble.
Building a Solid Core
Non-porous, homogeneous sheet
The finished panel has no pores and no separate layers. The resin and paper form one continuous material. Water cannot find a path through the core. This property makes compact laminate a good choice for outdoor cafe tables. The Round Outdoor Bistro Table uses a 12 mm phenolic top for this reason. Rain and spills stay on the surface. They do not soak in. A cross-section under a microscope shows uniform density from face to core. No voids, no dry spots, no layer lines. That uniformity is the mark of a well-pressed panel. A water absorption test on a small sample shows very low pickup, which confirms the core stays sealed.
Layers bonded into one solid
The layers are bonded together under heat and pressure. They are heated to permanently meld together. The boundary between layers disappears. A cut edge shows the same dense material from face to core. This homogeneity gives the panel its strength. Impact loads spread across the sheet instead of splitting a seam. The panel behaves as one piece, not as a stack of papers. That is the defining result of the high-pressure compact laminate process. The same principle applies to any hpl panel built for heavy use. The layers are compressed under high pressure until they become a single solid block. A peel test on a finished panel does not separate the layers. The bond is stronger than the paper itself.
Cooling and Conditioning
Controlled Cooling
Preventing warp and stress
A hot panel leaves the press with internal stress locked inside it. The resin cures at high temperature, and the sheet wants to contract as it cools. Fast cooling makes the faces and the core shrink at different rates. That mismatch pulls the panel out of flat. A warped top rocks on a cafe table and does not sit level. Plants cool panels gradually instead of quenching them. They let the stack rest in still air or move it through a slow cooling line. The temperature drops in steps, not in one jump. This gentle drop lets the whole thickness contract together. It also prevents stress cracks along the edges, where thin sections cool fastest.
Weighted stacking
Workers stack cooled panels under weight. A flat, heavy load presses down on each sheet while it settles. The weight holds the panel flat through the last of the cooling. It also stops a sheet from bowing as it releases heat. Stacks stay level and square, with no overhang at the edges. A panel that cools under weight keeps its flatness better than one left loose. Flatness matters for a cafe top, because a level surface keeps cups steady and looks right from every seat.
Moisture Conditioning
Stabilizing dimensions
A pressed panel still holds a small amount of moisture from the air around it. That moisture moves in and out with the room. If a plant cuts the sheet before it settles, the top can change size after machining. Holes drift, and edges no longer line up. Moisture conditioning gives the panel time to reach balance with its surroundings. Panels rest in a controlled space until their moisture content levels off. Only then does the sheet move to the cutting line. Stable dimensions keep every top true to its drawing.
Acclimating to humidity
Cafe tables face humid air, rain, and dry indoor heat. A top that acclimates in a balanced shop space handles those swings with less movement. The conditioning room holds a steady humidity level, and panels stay there long enough to equalize. This step matters most for outdoor and cafe use, where the table sees weather all year. A well-conditioned compact laminate top keeps its shape through damp mornings and dry afternoons. The panel arrives at the saw flat, stable, and ready for accurate machining.
Cutting and Machining
Cutting to Size
CNC routers and saws
A cured panel leaves conditioning as a full sheet. The next step cuts it to the exact size of the finished top. Computer-controlled routers and panel saws handle this work. A CNC router follows a programmed path and cuts the round shape of a top with a clean, repeatable edge. The Round Outdoor Bistro Table shows the result: a Ø700 mm round top cut to a precise diameter. Programmed cutting keeps every top in a batch identical. Operators load the cutting file once, and the machine repeats the same path on each sheet.
Tops, legs, and supports
Cutting covers more than the top. The same shop cuts support parts and mounting plates to their own drawings. A compact laminate cafe table needs a top, a base, and a connection between them. Each part follows its own cutting program. Shops often run this work on standard woodworking equipment fitted with cutters rated for dense phenolic sheet. The material is harder than wood, so feed rates and cutter choice matter. A slow, steady feed gives a clean cut. A fast feed can chip the edge.
Drilling and Edge Profiling
Hardware holes
Drilling comes next. Workers bore holes for the hardware that joins the top to the base. Hole position must match the mounting plate exactly. A hole that sits off center pulls the top out of line and makes the table wobble. CNC drilling holds the pattern to a tight tolerance. The machine drills all holes in one pass, so every top lines up with its base the same way.
Safe edge profiles
Edge profiling shapes the rim of the top. A sharp square edge feels harsh and chips easily. A small roundover or chamfer softens the rim and resists damage. The profile also protects hands and clothing in a busy cafe. Cutting and profiling belong to the same fabrication stage, and both demand sharp tooling. A dull cutter burns the resin and leaves a dark line along the edge.
Groove technology offers another way to attach a top to a base. A machined groove in the underside accepts a mounting ring or bracket. This hidden joint keeps the surface clean and the connection strong. The compact laminate top carries the load through the groove, and no fasteners show on the face.
Edge Finishing and Surface Treatment
Water-Resistant Edges
Non-porous core throughout
A cut edge on a compact laminate top does not soak up water. The reason sits inside the panel. Every kraft layer in the core went through full resin impregnation before pressing. The high-pressure compact laminate cycle then fused those layers into one dense block. A cross-section shows the same solid material at the rim as at the face. No dry paper, no open pores, no path for liquid to travel inward.
This trait separates compact laminate from a veneered panel. A veneered top hides a soft substrate under a thin skin. Water finds that substrate at any exposed edge and swells it. A compact top carries its own structure, so the rim behaves like the surface. Cafe staff can wipe a spill that runs over the side without chasing moisture underneath.
Sealing and polishing
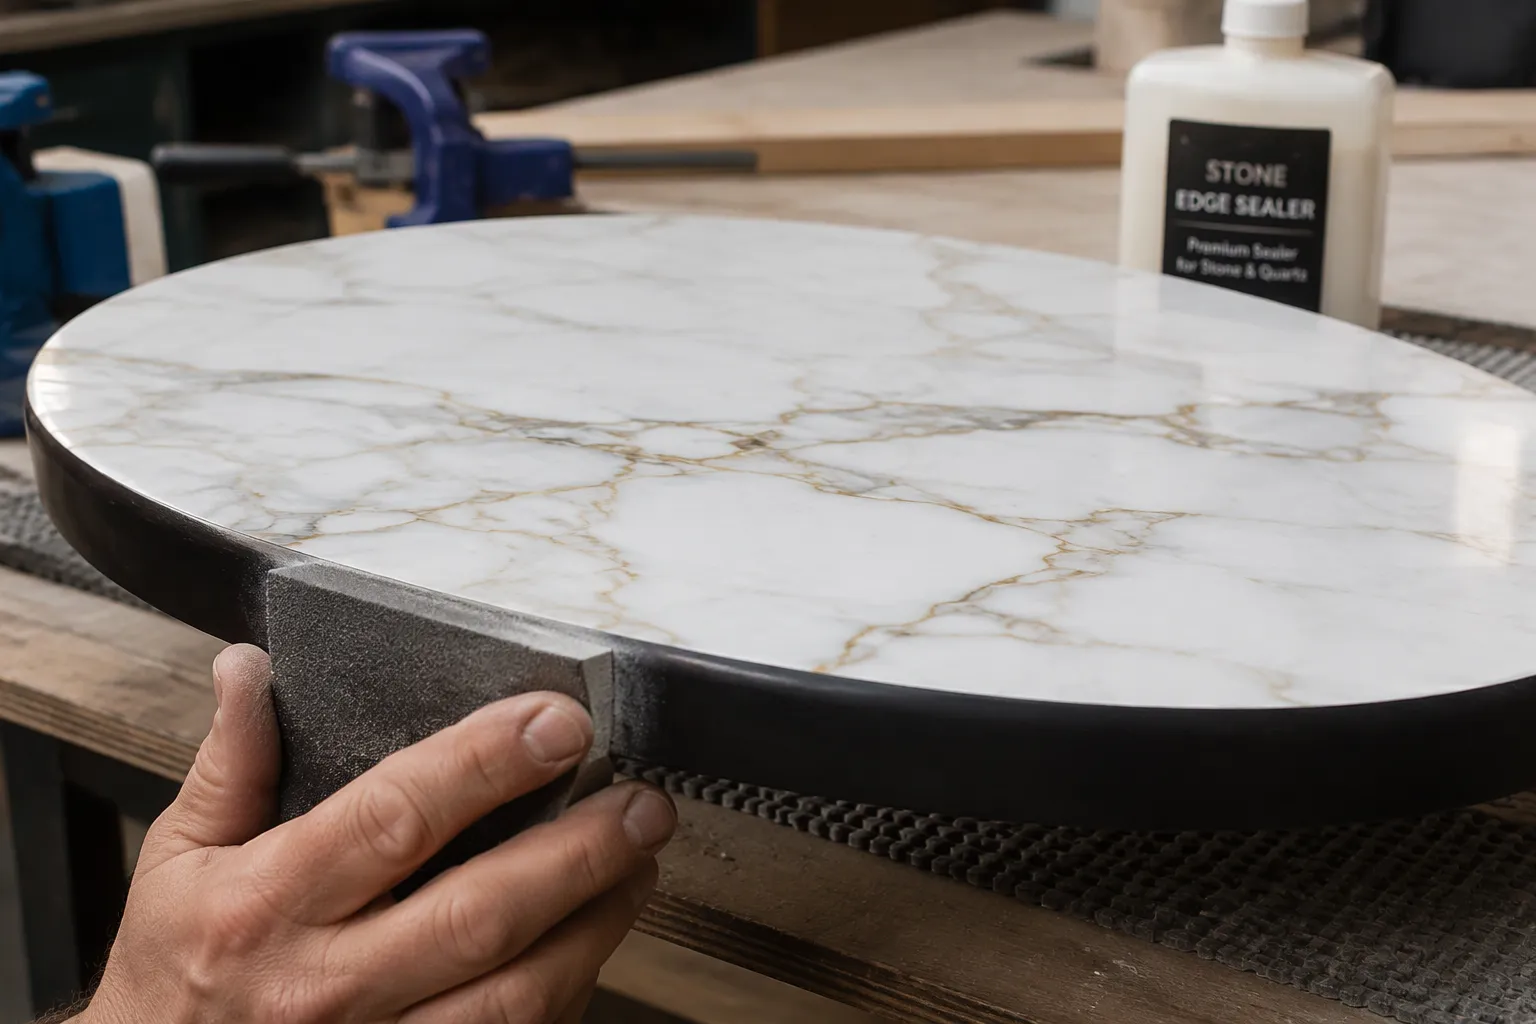
Sealing adds a second line of defense. Machining leaves microscopic tool marks on the rim. A sealer fills those marks and closes the surface. Polishing then smooths the edge until it feels like the face. The sealed rim sheds coffee, rain, and cleaning spray instead of holding them. This step matters most on outdoor tabletops, where edges face weather on every side.
Edge Banding and Polishing
Matching or contrasting bands
Edge banding gives the rim a finished look and extra protection. A band can match the décor for a seamless appearance. It can also contrast for a deliberate design line. The Round Outdoor Bistro Table uses the second approach. Black edge banding forms a dark rim around the Calacatta-look top. The band frames the white base and gray-gold veining and gives the round top a crisp outline.
The band also guards the edge against knocks. Chairs, trays, and cleaning carts strike table rims all day in a busy cafe. A bonded band absorbs that contact and keeps chips away from the core.
Sanding and sealing
Workers sand each band flush with the face. A flush band feels smooth to the hand and catches no cloth. Sanding moves through finer grits until the joint line fades. A sealer then coats the band and the joint. This final seal locks the band in place and keeps water out of the bond line. The finished rim reads as one piece, and it performs like one too.
Surface Finishing Options
Matte, gloss, and texture
The press plate sets the surface character, and finishing completes it. A matte face cuts glare and hides fingerprints, which suits a cafe with bright windows. A gloss face reflects light and shows color depth, though it shows smudges sooner. A textured face adds grip and hides scratches. The Calacatta 7378 matte finish on the bistro table falls in the first group. Its low sheen keeps the marble pattern readable without a mirror effect.
Optional protective coatings
Some tops receive an optional coating for extra wear resistance. A coating can raise stain resistance and ease daily cleaning. It does not replace the melamine surface, which already resists scratches and heat. Buyers should treat a coating as an add-on, not a necessity. A well-pressed hpl top with a sealed edge handles normal cafe service on its own.
Projects that weigh laminate against other surfacing materials can read a comparison of HPL and solid surface materials for kitchens before a specification is fixed. Finishing closes the loop that impregnation and pressing opened. Resin saturation built the barrier. Heat and pressure made it solid. Edge sealing and surface finishing keep that barrier intact at every cut and corner. A buyer who checks these details can judge how a top will age under daily use.
The decorative faces on a compact laminate top come from the same high-pressure laminate family as the sheet products below, so a decor can be checked against the process described above.
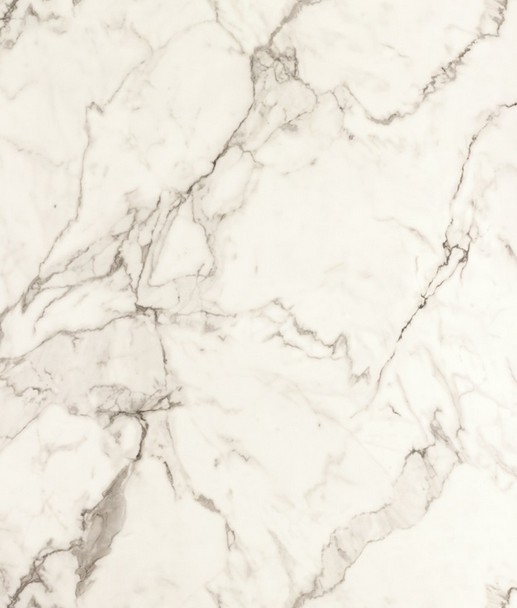
7378 Calacatta Marble
Marble-look high-pressure laminate sheet with a Calacatta decor and a matte surface, used for tabletops, wall panels and joinery.
View Product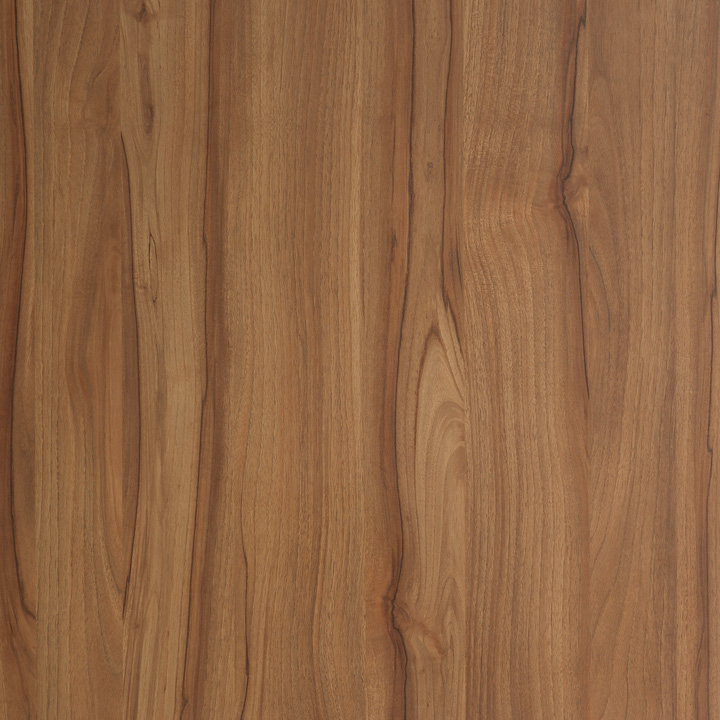
7067 Oiled Walnut
Woodgrain high-pressure laminate sheet with an oiled walnut decor for furniture, wall linings and interior joinery.
View Product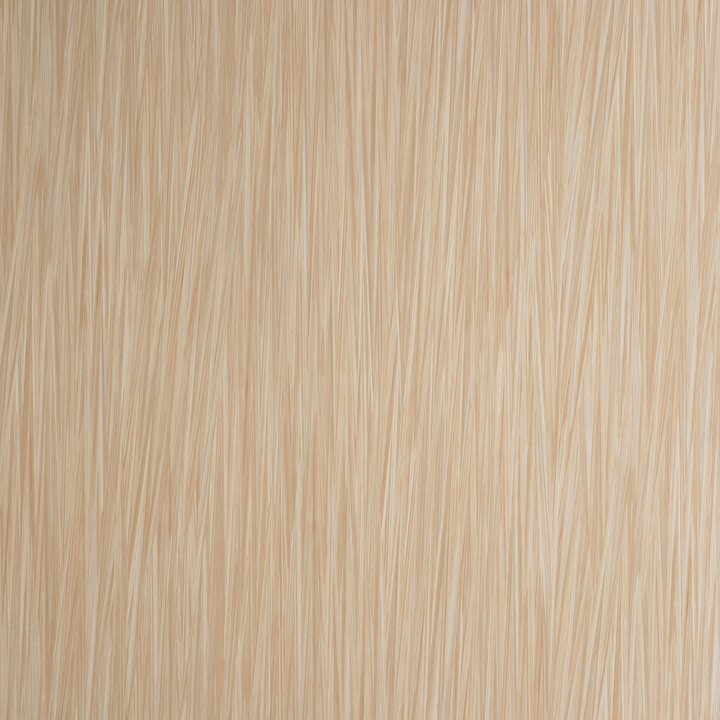
Wooden HPL Sheet
Printed timber decor on a high-pressure laminate sheet, supplied for furniture faces, wall linings and cabinetry.
View ProductCheck the Surface and the Core Together
Sheet decors, application notes and current product information can be reviewed alongside the production data.
Quality Control and Packaging
Testing and Inspection
Thickness and flatness
Inspectors measure each panel with calipers at several points across the face. A top that runs thin in one corner will flex under a cup and rock on a level floor. Flatness gets checked on a true surface. A straightedge laid across the top shows any gap, and a gap means the sheet warped during cooling. Panels that fail either check leave the line before machining.
Water, impact, and wear tests
Lab staff cut small samples from production panels and soak them in water. They weigh each sample before and after to confirm low absorption. A drop test strikes the face with a weighted object and checks for cracks or dents. A wear test rubs an abrasive wheel across the surface and counts the cycles until the décor fades. These checks confirm that a compact laminate cafe table holds up to spills, knocks, and daily wiping.
Assembly Checks
Hardware fit and stability
Assembly staff dry-fit the top to the base before packing. The Round Outdoor Bistro Table shows the parts they check. Its 12 mm top weighs 6.7 kg, and its steel base weighs 4.0 kg, for about 10.7 kg total. The 60×60 mm square steel column must sit square to the 440×440 mm aluminum mounting plate. Bolts must thread freely and tighten without stripping. A plate that sits off center pulls the column out of plumb.
Load and wobble tests
A finished table goes on a flat floor for a wobble check. Staff press each corner and watch for lift or rock. They then load the top with weight and confirm the joint holds. A table that rocks or flexes fails and returns to fabrication for adjustment.
Protective Packaging
Edge and foam protection
The rim takes the most abuse in transit. Workers wrap the edge in foam or corner guards before the top goes into its carton. A foam sheet separates the top from the base parts. This padding keeps chips and scuffs away from the finished surface.
Carton sealing and labeling
Cartons close with reinforced tape along every seam. Labels list the model, top size, and finish so warehouse staff can match tops to bases. Clear labels also help cafe owners confirm the right tables arrive on the first delivery.
Nine steps take a compact laminate cafe table from raw paper to packed furniture. High-pressure lamination does the most important work. Heat and pressure melt resin-soaked layers into one dense, non-porous solid.
Impregnation builds the moisture barrier. Pressing locks that barrier into a core that is the same all the way through. Edge finishing seals every cut and rim. Together these steps make a top that stands up to water, stains, and the daily knocks of cafe service.
Buyers assessing a compact laminate cafe table supplier can compare the production records behind each order against these standards, and can request the press cycle and resin content records before placing one. Modern cafe furniture keeps moving toward longer service life and cleaner design, and well-made compact laminate sits at the center of that trend.
FAQ
Does a compact laminate cafe table absorb water at the edges?
No. Every kraft layer in the core carries phenolic resin before pressing. Heat and pressure fuse those layers into one dense block. A cut edge shows the same solid material as the face. Edge sealing and banding close any tool marks, so spills and rain stay on the surface.
Can the table stay outside all year?
Yes. The phenolic core resists moisture, and the melamine face resists scratches and stains. The Round Outdoor Bistro Table pairs a 12 mm phenolic top with a steel base for this reason. Outdoor restaurants, balconies, and cafe patios all suit this build. A covered spot still helps any table last longer.
How should cafe staff clean the surface?
Wipe the top with a soft cloth and mild soap. Rinse with clean water and dry the surface. Avoid abrasive pads and strong solvents, which dull the matte finish. The Calacatta 7378 matte face hides fingerprints well. Regular wiping keeps the marble pattern readable.
Why do cafe tops usually measure 12 mm to 13 mm thick?
Compact grade panels commonly run 12 mm to 13 mm. That range gives the top enough stiffness to support two-person dining without extra weight. The Round Outdoor Bistro Table uses a 12 mm top. Thinner panels flex more, and thicker panels add weight without much gain for cafe use.
Is the table heavy enough to stay stable?
The Round Outdoor Bistro Table weighs about 10.7 kg in total. Its top weighs 6.7 kg, and its steel base weighs 4.0 kg. The 60×60 mm square steel column and 440×440 mm aluminum mounting plate keep the joint rigid. A stable base matters more than raw weight alone.
How does a buyer judge manufacturing quality?
Check the edge first. A well-made top shows uniform density at the rim, with no dry paper or gaps. Ask about press temperature and pressure, resin content checks, and moisture conditioning. A maker that explains these steps clearly usually controls them well, and a documented process makes that review possible.
Will the matte finish wear off over time?
No. The press plate stamps the texture into the resin surface during lamination. The finish is part of the panel, not a coating on top. Normal cafe service will not rub it away. Heavy scratching can still mark any surface, so felt pads under chairs and trays help.
References and Notes
Paper industry data on fibre recovery and recycling — supports the use of recovered paper fibre in the kraft core (cepi.org, accessed 2026-11-11).
Technical resources on paper impregnation, coating and drying — supports the description of resin saturation and oven drying (tappi.org, accessed 2026-11-11).
Background on formaldehyde in resins and indoor air — relevant to the melamine and phenolic binder system discussed in the article (epa.gov, accessed 2026-11-11).
Standard reference: EN 438 defines compact grade decorative high-pressure laminate from 2 mm upward; press temperature and pressure figures in the text describe the range commonly used for HPL production and are not a single published setting.
Data notes: the 12 mm top mass of 6.7 kg, the 4.0 kg steel base, the 60×60 mm column and the 440×440 mm mounting plate are figures for the specific model described in the article, as published by the manufacturer, and are not industry-wide values.
Internal links: every link to en.czhjl.com present in the original article is retained, with anchor text matched to the page each link actually opens.
CATEGORIES:

 Contact Us

 Online Sales

 Case Study

 News Center

 Product Brochure